Send Commands
The quick start guide provides the fastest way to send commands to your IoT device through the Anedya console. However, you should refer to other documentation before going for production deployments.
By completing this guide, you'll be able to send commands directly to your device from the Anedya console.
Objective
This guide will show you how to configure your device to receive commands directly from the Anedya Cloud. This is a crucial aspect of your IoT application as it allows you to control your device remotely.
Prerequisites
Getting started on the Anedya Platform is very simple. But before we proceed further, there are a few prerequisites:
-
Anedya IoT Cloud Account: Ensure you have an account with the Anedya IoT Cloud. If not, you can easily sign up here. The best part? It's completely free, and no credit card is required!
-
Project Setup in Anedya: Make sure you have project setup in your Anedya account. Read this guide to create one!
This guide uses the ESP32 to have a simple setup and internet connectivity without requiring any additional hardware. However, you are free to use any hardware you want.
Setting Up Hardware
To begin, connect an ESP32 development board using the Arduino IDE.
Working with different hardware? Check out these examples:
Let's get started!
Arduino Code
Copy the example arduino code
This example code uses MQTT to connect with the platform. You can also connect using HTTP! for HTTP, please refer to the HTTP Commands Api
Paste it in a arduino sketch and we need to modify the following part
// Provide your connection key, that you can get from the node details section
const char *CONNECTION_KEY = "CONNECTION_KEY";
// Provide your Physical Device ID
const char *PHYSICAL_DEVICE_ID = "PHYSICAL_DEVICE_ID";
// Wifi ssid and password
const char *SSID = "SSID";
const char *PASSWORD = "PASSWORD";
Provide your connection key, physical device id, wifi ssid and password.
const int ledPin = 2;
Assign your dev board inbuild LED's pin number to the variable ledPin.
Let's have a look at the main part of the code, the rest is just normal stuff.
// MQTT connection settings
String str_mqtt_broker="mqtt."+REGION_CODE+".anedya.io";
const char *mqtt_broker =str_mqtt_broker.c_str() ;
const char *mqtt_username = PHYSICAL_DEVICE_ID;
const char *mqtt_password = CONNECTION_KEY;
const int mqtt_port = 8883;
// Subscribe topic for the anedya responses
String responseTopic = "$anedya/device/" + String(PHYSICAL_DEVICE_ID) + "/response";
 // Subscribe topic for the anedya errors
String errorTopic = "$anedya/device/" + String(PHYSICAL_DEVICE_ID) + "/errors";
// Subscribe topic to receive Anedya commands
String commandTopic = "$anedya/device/" + String(PHYSICAL_DEVICE_ID) + "/commands";
Here, we define the essential configuration parameters for the MQTT connection such as the broker's URL, port, username, and password. We also define the topics for receiving commands, responses and errors.
  esp_client.setCACert(ca_cert);                // Set Root CA certificate
  mqtt_client.setServer(mqtt_broker, mqtt_port); // Set the MQTT server address and port for the MQTT client to connect to anedya broker
  mqtt_client.setKeepAlive(60);                  // Set the keep alive interval (in seconds) for the MQTT connection to maintain connectivity
  mqtt_client.setCallback(mqttCallback);         // Set the callback function to be invoked when MQTT messages are received
Here, we provided the Root CA certificate, set the MQTT server address and port, set the keep alive interval, and set the callback function to be invoked when MQTT messages are received.
connectToMQTT();
This function attempts to establish an MQTT connection and subscribe to the Anedya topics.
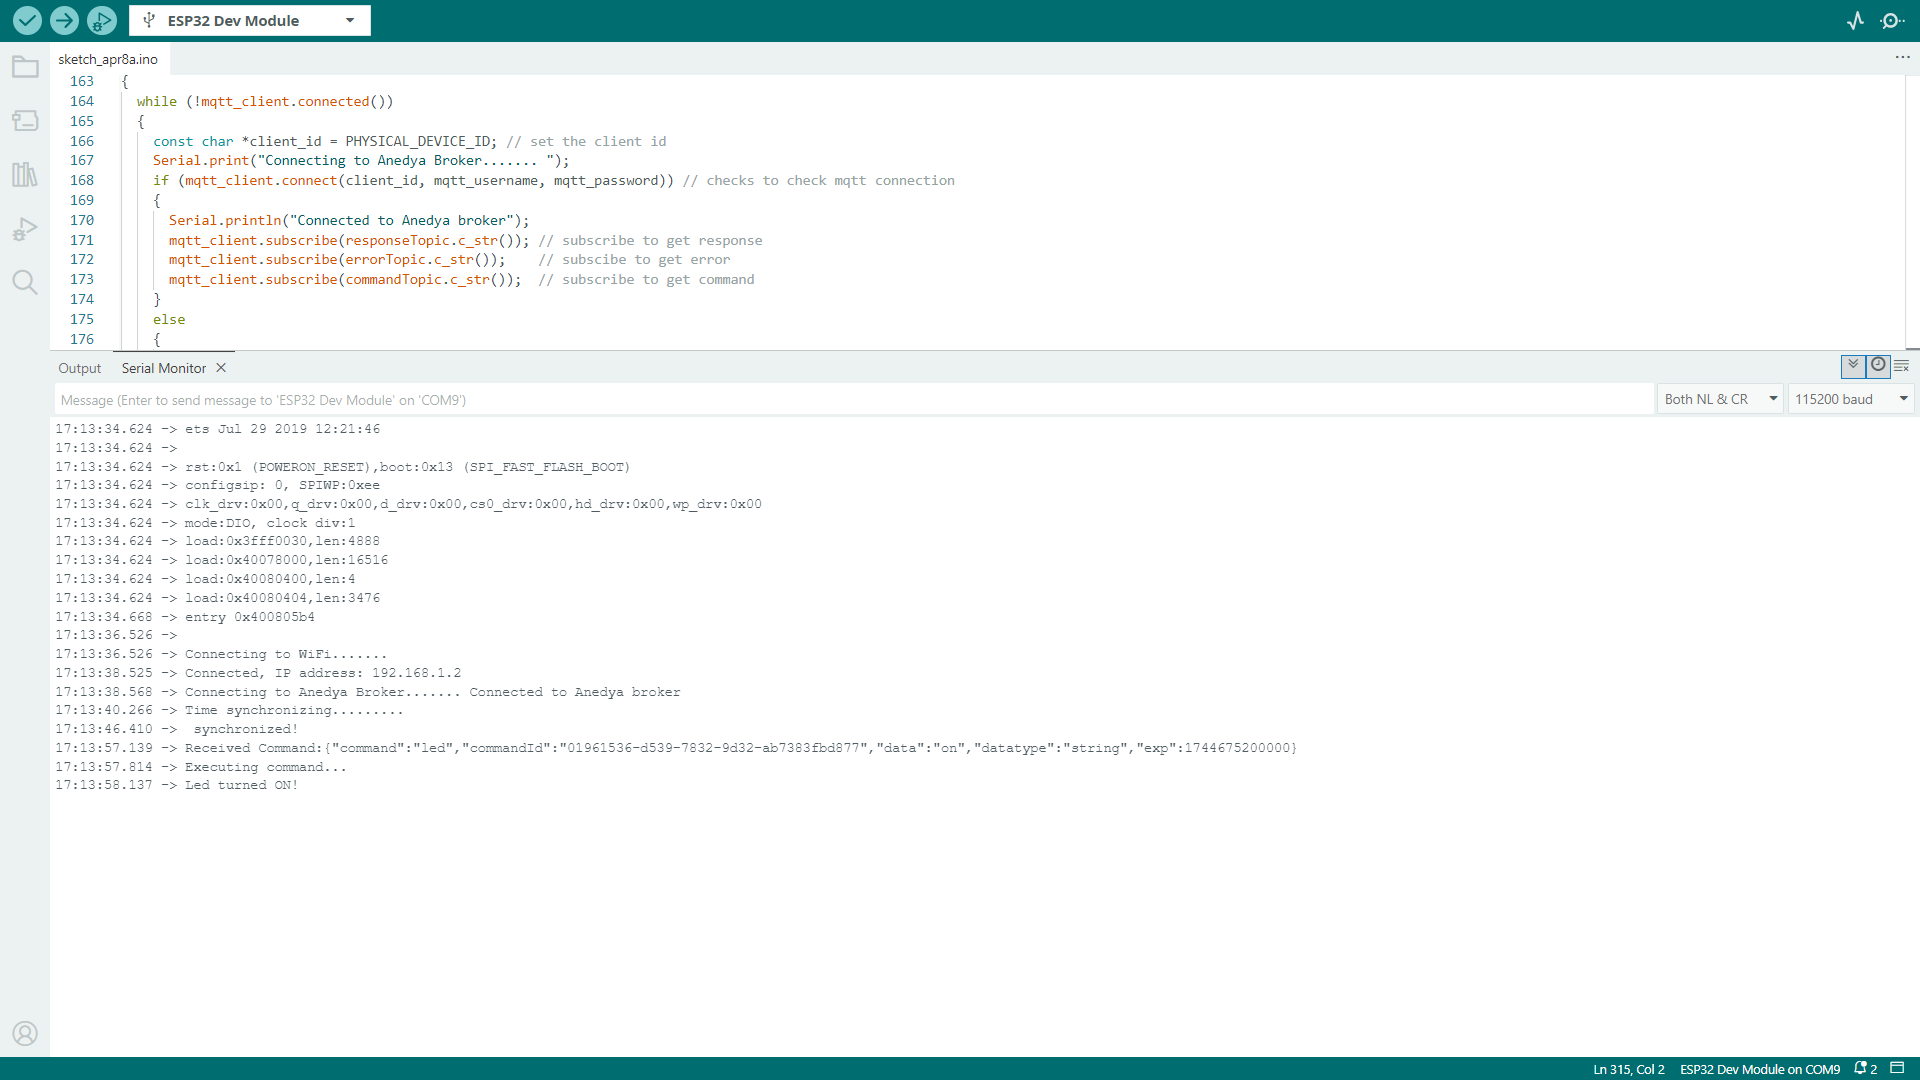
void mqttCallback(char *topic, byte *payload, unsigned int length)
The mqttCallback function is invoked whenever a message is received on any of the subscribed topics. It is responsible for parsing the message payload, extracting the command, and triggering its execution within the loop function.
Now, install the required libraries, compile the code and upload it to your ESP32 board.
Send Commands
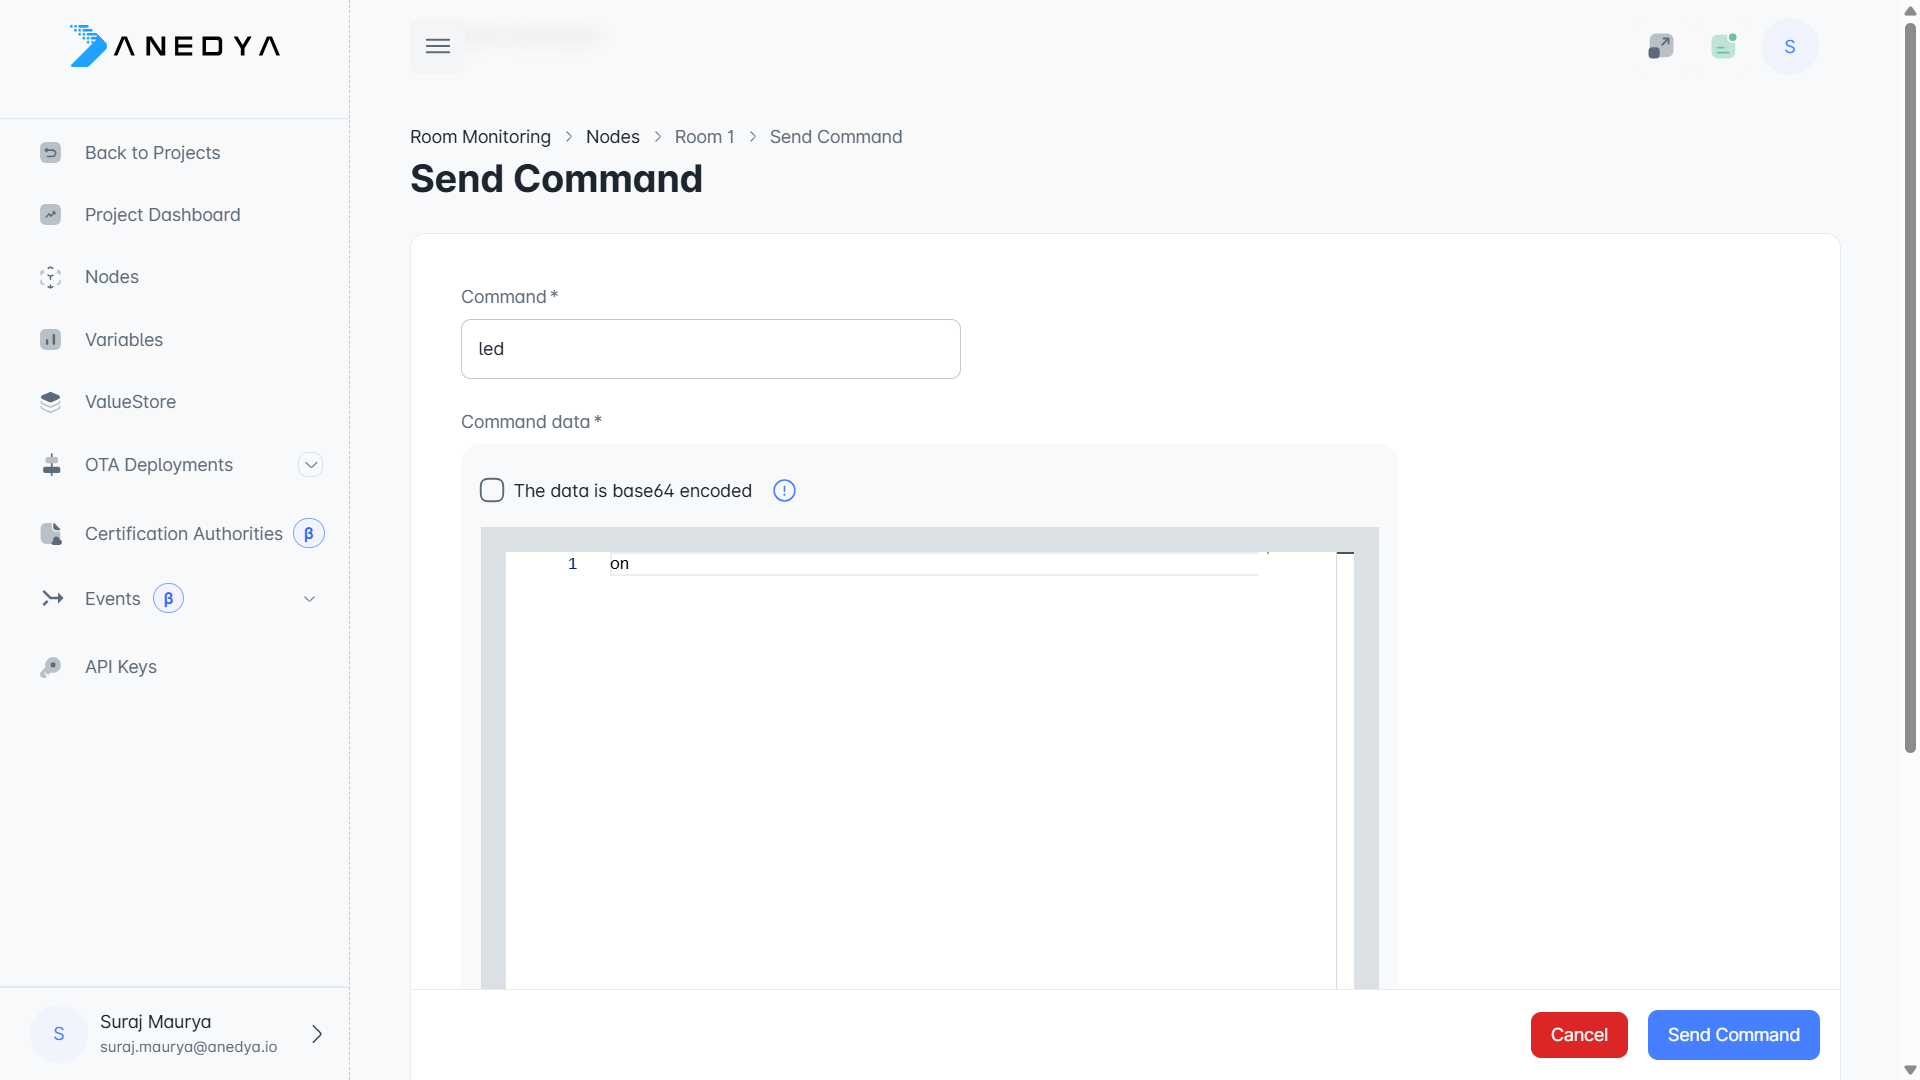
Now, let's send a command to the device. To do this, go to the Node details ->Commands section click on the create command button. In this section, you can enter a command and command data, and then click the Send command button to send the command to your device. The command will be received by the device through the MQTT connection, and the device will execute the command.
To turn on/off the inbuilt LED, you can use the following commands:
- To turn on the LED: Command:
led, Command Data:on - To turn off the LED: Command:
led, Command Data:off